
")
By now you’ve see the hanging bed that my hubby made and how we hung it in our screened in porch. Early in the research of our hanging bed, it didn’t take Mike and I long to come to one conclusion. I was going to have to make the mattress cover for the hanging bed along with the bolsters and pillows.
Seriously? But why? The answer was simple – to get what we wanted (oh boy, here we go), with the quality of fabric that we wanted, and at a price that was reasonable. (Ok, so now we’ve come to the real reason – ha!)
Oh, before coming to this conclusion we did find the PERFECT one online!! It was a custom-made cover which included the full-size mattress. It also had an option for adding back pillows and bolsters. The cover had a zipper so that it could be removed for easy cleaning. We could choose our own outdoor fabric with 3 back pillows, 2 side bolsters, and 2 small accent pillows. It was a dream come true. The online find was exactly what we wanted!
So, we put our selections in the online cart – and ……. press ENTER – and ………………. the total was ……………. $2,079 (but with free shipping – like that was really going to entice us to purchase it). Oh, and it would ship in 50-60 days.
WHAT!!!!!! Nope, that was not going to work. So, this was obviously a case of having champagne taste on a beer budget (the story of our life). We didn’t want to wait that long for our bedding. More importantly, we didn’t want to pay over $2,000. There was only one option. Susie Seamstress (otherwise known as me) was going to have to make the hanging bed mattress cover.
In the interest of full-disclosure, I will tell you that I’ve been sewing since I was in middle school. (Well, in my day we called it Jr. high but I was trying to make myself appear younger – LOL!). Or, to sound really cool, “I’ve been sewing for a minute.” (My 21-year-old college son taught me that phrase.) (What is up with these phrases?) I was taught my sewing skills by none other than Mama H (yep, that’s my mom).
And, Mama H is a perfectionist. (These days she mainly sews beautiful quilts – and they are AMAZING!!!) So, I felt confident that I had the skills to undertake this challenge. I also knew that it was going to cost a little cash to get it the way we wanted it. But, I was 100% confident that I could significantly beat the $2,079 online price. (Just an fyi – I’ve never had a confidence issue, can you tell? And, I’m really competitive – Ha! Ha!)
I also want to point out that I do NOT think that you need years of sewing experience to attempt this. The actual sewing part is not difficult since it’s basically straight lines. However, putting in zippers and adding double welting along the perimeter of the mattress cover isn’t a beginner skill (in my opinion, or IMO).
So, would I attempt this if it were my first time to sew? – probably not (unless you exude confidence). Would I attempt it if I knew the phrase “cutting on the bias”? Yep!!
Fabric Selection
Fabric selection was of the utmost importance in undertaking this task. If I was going to take the time and effort to create a custom covering, I wasn’t about to use an inexpensive fabric. I have seen plenty of daybed coverings that wrinkled the first time you laid on it. Or, the covering didn’t hold up and had to be replaced in a couple of years.
So, I specifically looked for an outdoor fabric with a heavy weave. I went to my favorite home décor fabric shop – Cutting Corners in Dallas, TX. Outdoor fabrics resist mold, mildew, fading, odors … and the list goes on.
While I do love color and patterns, I’ve learned over the years to pick fabrics with a more neutral color for my main pieces (like couches, bedspreads etc…). Then, add color and patterns with pillows and accessories. So, for the hanging bed mattress cover and side bolsters, I chose a pattern called Laguna in the color grey. This fabric was $30/yd but very durable which was important since I expected this hanging bed to get a lot of use.
For the 3 back pillows, I chose a striped outdoor fabric called Thirsty in the color grey which was $23/yd. And for my extra pop of color on the accent pillows, I chose a solid fabric called Coastal in the color Baltic. The Coastal was $43/yd. (EEKS! Good thing I didn’t need much of this one).

I also planned to cover my own piping with the Laguna fabric so that I could have welting on both the top and bottom perimeter of the porch swing cover. And, I wanted to add welting around the ends of the side bolsters. For this, I needed 17 yards of piping but luckily this was the cheapest part of the whole project. It was only .30/yard. (Yes, you read that correctly – 30 cents a yard, NOT 30 dollars a yard. So, $5).
As a rule, I also always purchase a little more fabric than what I need. The last thing you want is to be a few inches short. Plus, in this case I wanted a little extra for making other accent pillows. I was planning to add additional furniture to our screened in porch which would need pillows.
Cutting Out the Fabric
So, I got 9 yards of Laguna, 2 yards of Thirsty, 2 yards of Coastal, and 17 yards of piping. Now it was time to cut everything out. This is one of my least favorite things to do – it ranks right up there with prepping for painting. I also have another rule – I never cut out and sew on the same day. (My brain is too tired after figuring out how to get all the pieces on the fabric – Ha! Ha!)
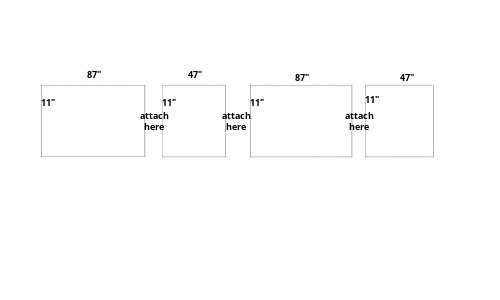
For those of you seriously considering doing this yourself, I took the liberty of showing the dimensions of how I cut out my pieces of fabric. If your eyes are glazing over right now and you have no intention of doing this, or if you’re like my little sister and have the attention span of a gnat, then just skip over this part – LOL! My sister’s strategy to reading my blog posts is to skip over the technical parts and only read the funny parts.
All of my fabrics were 55” wide and I generally use a ½” seam allowance for my home sewing projects. So, I add 1 inch to what I want my finished dimensions to be when I cut. I had already purchased my full-size mattress which was 54” x 75” and it was 10” thick. The side bolster foam pieces that I purchased were 8” x 54”. (No scrawny side bolsters here).
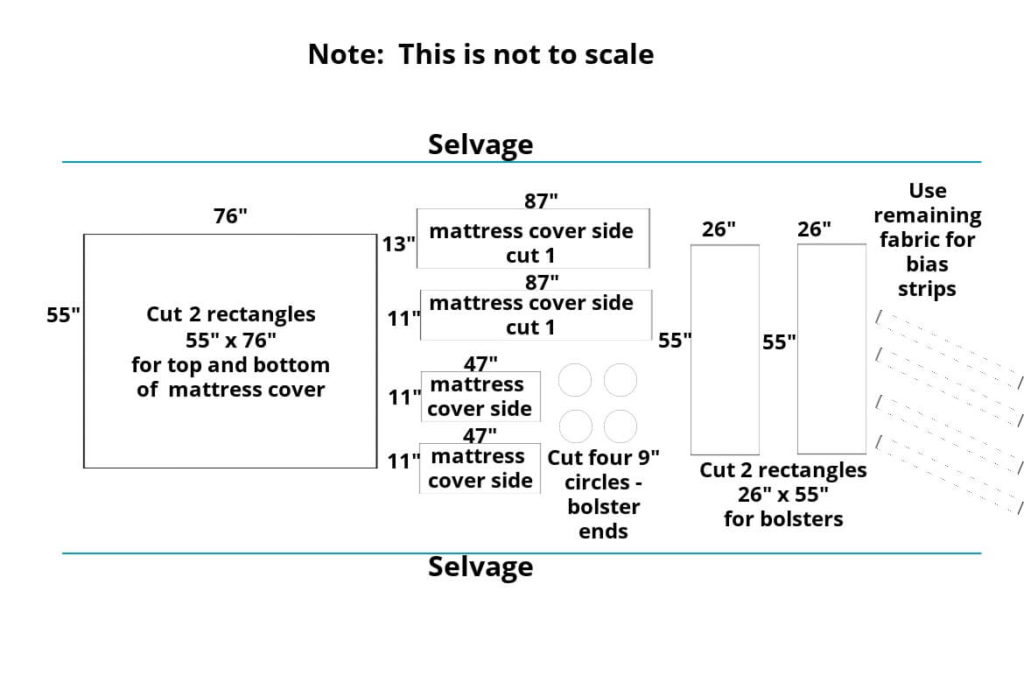
I can’t believe I actually had to use Geometry to figure out how to cut the rectangles for the bolsters. First, I needed to know the circumference of a circle which is 2 · π · r. Since my bolsters had a 4” radius (or 8” diameter), I had to multiply 8 by 3.14 (the value of Pi). This gave me a value of 25 then I added 1 inch for seam allowance. This brought my total width needed to 26”. My bolsters are 54” long, so I also added an inch to bring my total length to 55”. I just wanted to illustrate how I arrived at the bolster rectangles of 26″ x 55″.
Remember all those times in school you said to your Math teachers “When am I ever going to use this in real life?” Well, there ‘ya go – perfect example for all you teachers out there.
When building the swinging bed, I was there every step of the way to help my hubby. But, he did most of the work. He returned the favor to me when it was time to cut out this fabric. (Have you ever tried working with 9 yards of fabric before? Exhausting!)
Sewing the Hanging Bed Mattress Cover
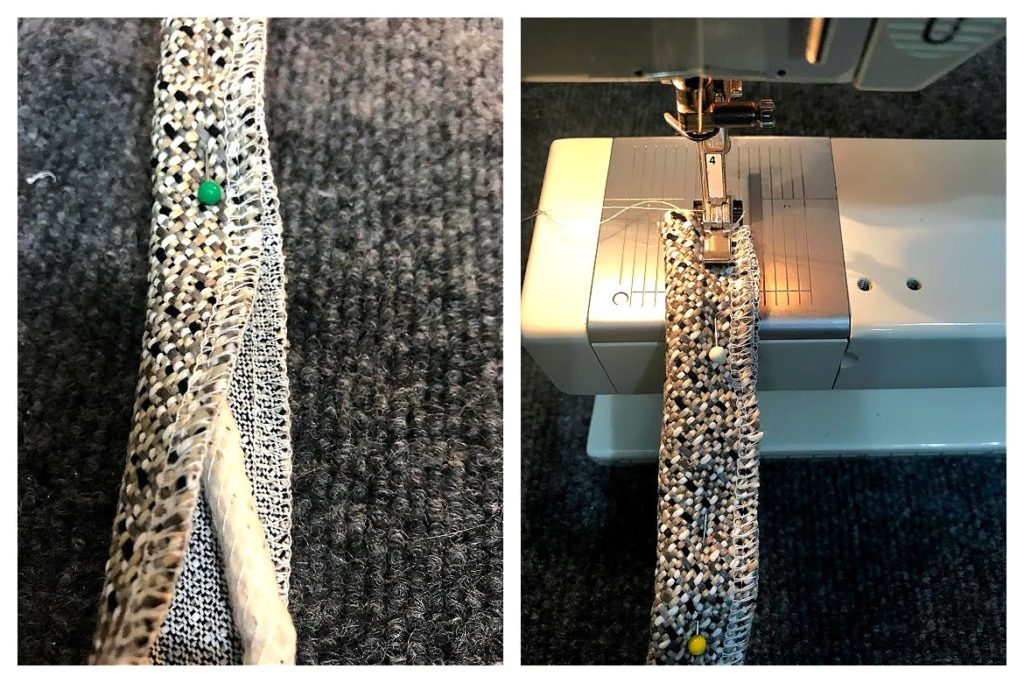
After cutting all the bias strips, I attached enough of them (using ¼” seam) to give me over 262”. This is the length I needed to go around the perimeter of the cover. Remember to always put your fabric “right sides together, when putting two pieces together. I also ironed the seams open to make my next step easier.

Next, I took the cording (yep, the 30 cent a yard cording) and placed it in the center of my exceptionally long bias strip. Using my zipper foot, I sewed along the edge of the cording to create my covered welting. You may have noticed the finished edge on the bias strip that I did with my surger (definitely not necessary).
Now it was time to attach the welting to the 55” x 76” rectangle using the same zipper foot. Again, right sides together paying special attention to curve the edges. (I used a glass for my curved pattern then I cut the fabric). Next, clip the covered welting a few times as you go around the curve to make it easier.
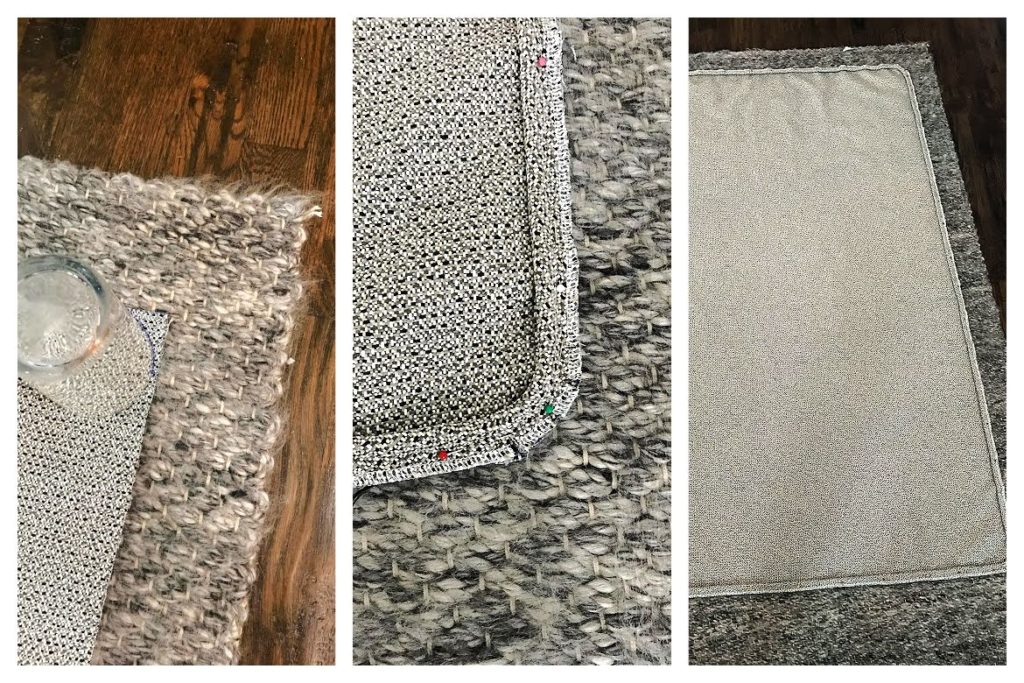
Once the welting was all attached, I repeated the ENTIRE process for the bottom piece of the 55” x 76” rectangle.
Adding the Zipper
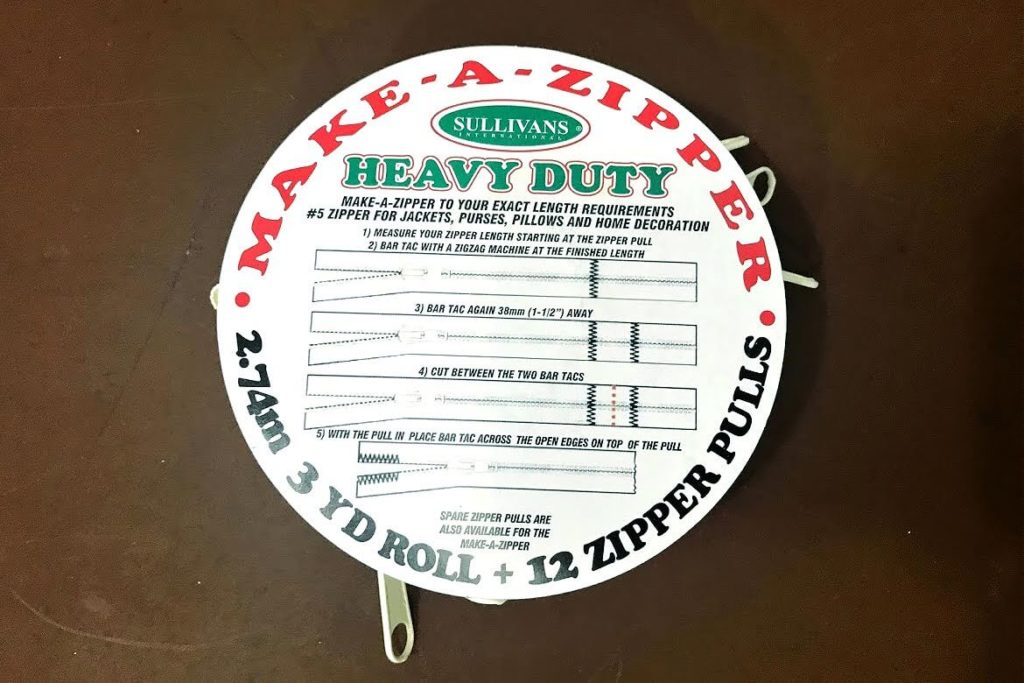
Now, it was zipper time. A really long zipper was needed so that I could make the cover removable. I also wanted to hide it in the back of the covering and have it span across the entire 75” length of the bed. I found a zipper where I could make it whatever length I wanted. Plus, it was heavy duty and perfect for home décor items.
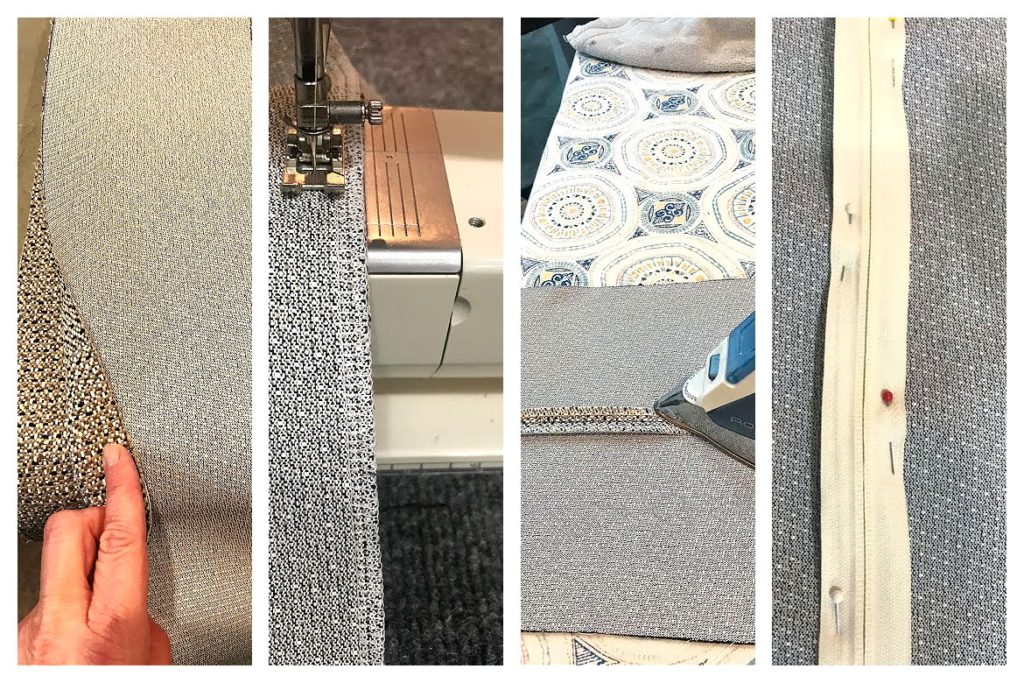
Using the 13” x 87” rectangle, I cut it right down the center which made two 6 ½” x 87” rectangles. These were placed right sides together and I used a long basting stitch on my sewing machine to attach them together. (The 87” sides were being attached together). I opened up the seam and pressed it. Then, I placed the zipper on the seam I had just pressed open, making sure the center of the zipper was in the center of my seam.
There are many ways to put in a zipper – this is just how I do it. Knock yourself out if you have another method – lol!
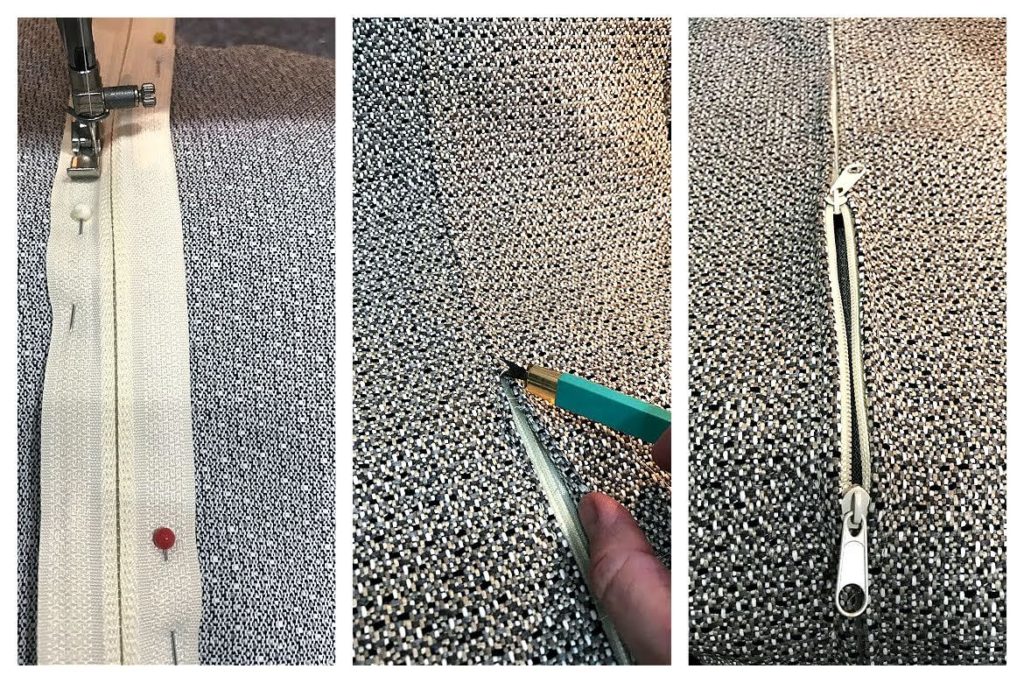
Again, using my zipper foot, I sewed around the zipper teeth on each side and the ends. When I was done, I turned the fabric over to the right side and removed the center basting stitch with a seam ripper. And would you look at that – my zipper was in!!!
Attaching it all Together
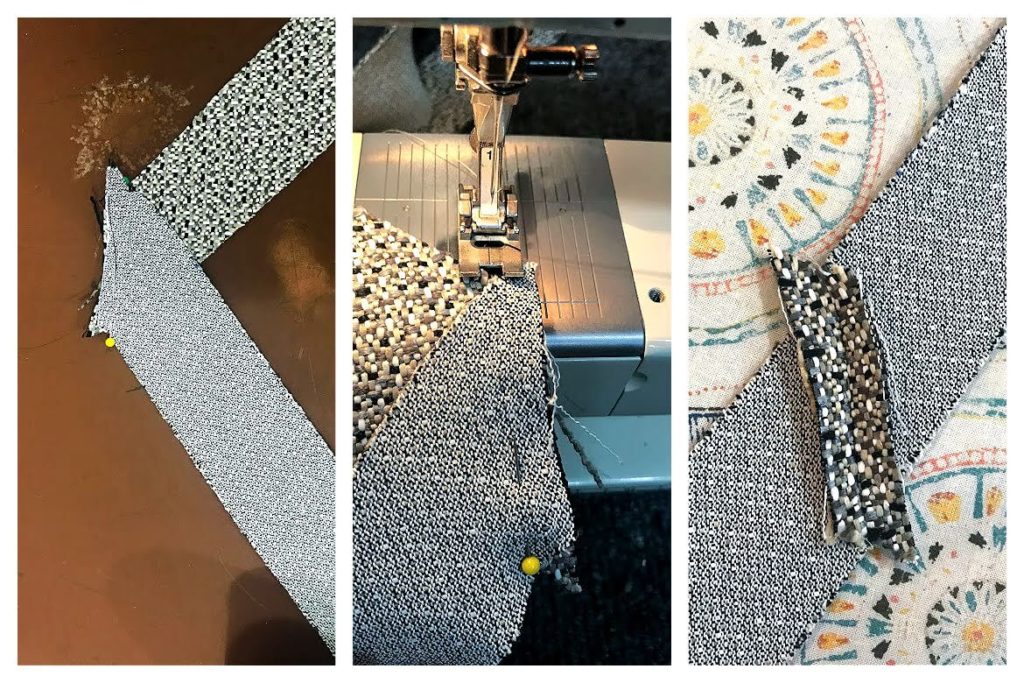
Now it was time to attach the side pieces together including the completed side piece that now had the zipper in it. I took the zipper piece and cut the width down to 11” to match the 3 remaining side pieces. (Remember, the zipper piece originally started out as 13″ x 47″.) I attached the zippered 87” side piece to a 47” side piece. Then, I added the remaining 87” side piece and the last 47” side piece. These were attached on the short 11” ends like the picture shows.
The final step was putting it all together. Again, right sides together, the top rectangle was pinned to the side pieces and sewn. I was careful when I attached to make sure that I didn’t have any side seams visible from the front. Once I got the side pieces all the way around, I also sewed the final side pieces together. This was repeated when attaching the bottom rectangle to the side pieces.
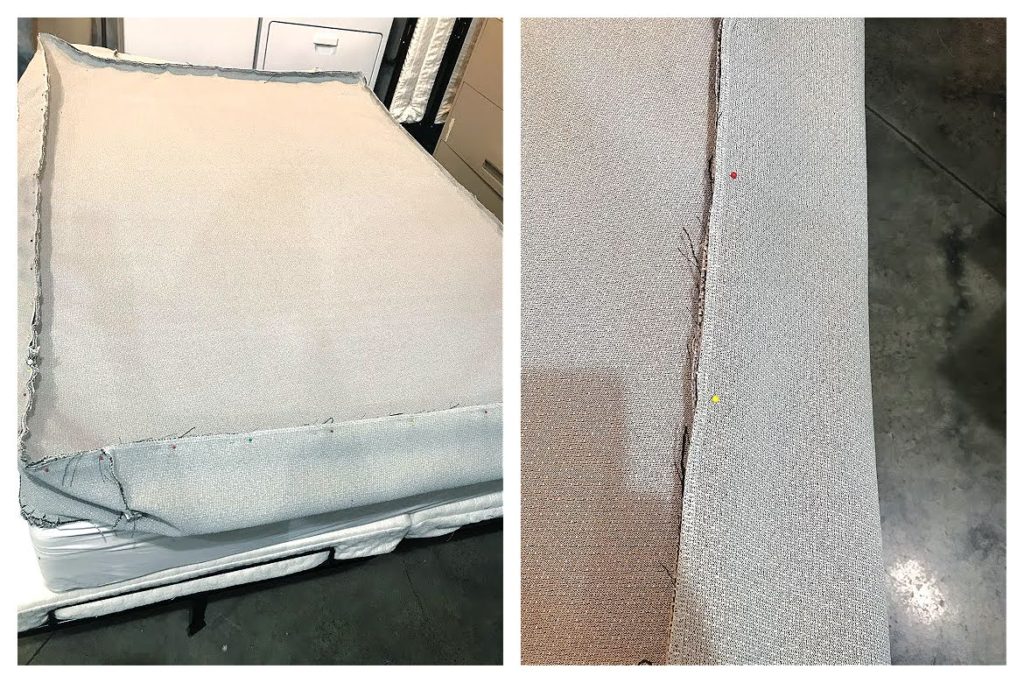
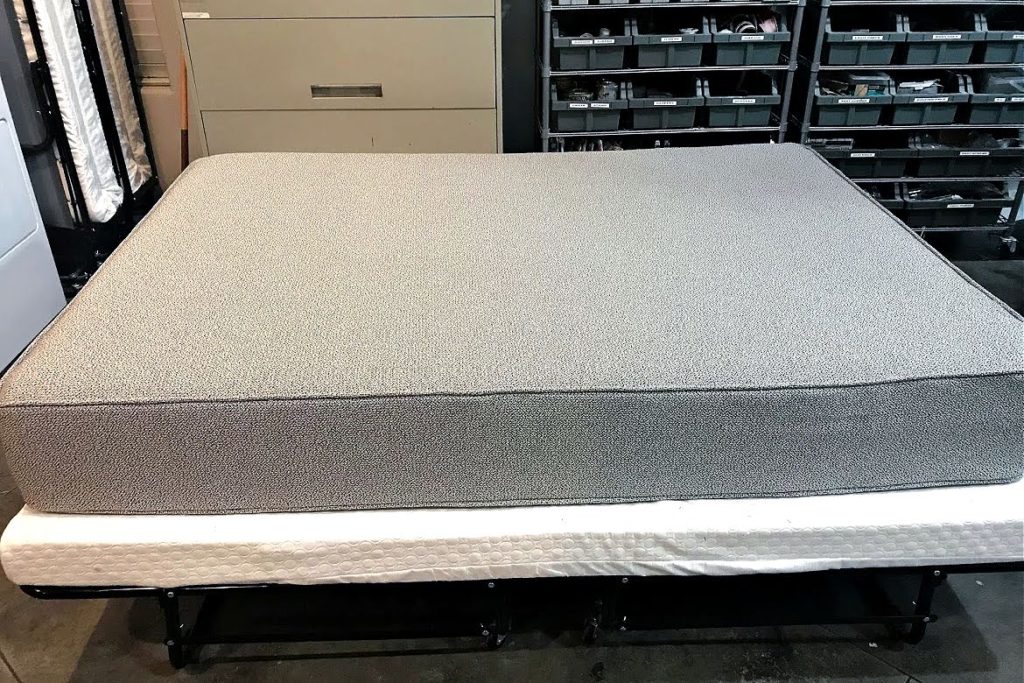
Once it was complete, I unzipped the cover and turned it right side out. We put a waterproof mattress protector on the mattress and slipped it into the cover. I had just made a custom hanging bed mattress cover!!!!
Sewing the Bolsters
After making that, the bolsters were super easy. I basically followed the same process, starting out with attaching my home-made welting to the end bolster circles. Again, when going around the circle, I clipped the covered welting to make it lay nicely on the circle.

On the 55” x 26” bolster rectangles, I attached zippers on each one. Then, I attached each bolster circle to the ends, turned them inside out, inserted the bolster forms. Poof!!! – I had 2 completed bolsters!
Sewing the Back Pillows and Accent Pillows
If you were able to sew that, then I won’t bore you with the details of putting together the back pillows and accent pillows. These were simple squares. However, I will share the pillow sizes and my finished cover sizes for the pillows.
The recommended size for back pillows on a full-size hanging bed is 26” x 26” with accent pillows of 16” x 16”. If you are making pillows for a different size bed (like a twin), then you will need to adjust your pillow sizes. Also, the “fullness” of how you want your pillows to appear is really a matter of personal preference. I like mine to appear very full.
So, the finished cover for a 26” x 26” pillow form is 24” x 24”. Which means that I cut my fabric 25” x 25” to construct my 3 back pillows.
The finished cover for a 16” x 16” pillow form is 15” x 15”. This means that I cut my fabric 16” x 16” to construct my 2 accent pillows.
My Finished Hanging Bed Mattress Cover
So, here’s how everything looked when I completed the entire mattress cover along with all pillows. I added a couple of cute dragonfly pillows that I happened to catch on sale at Wal-Mart. I was super happy with the end result!!
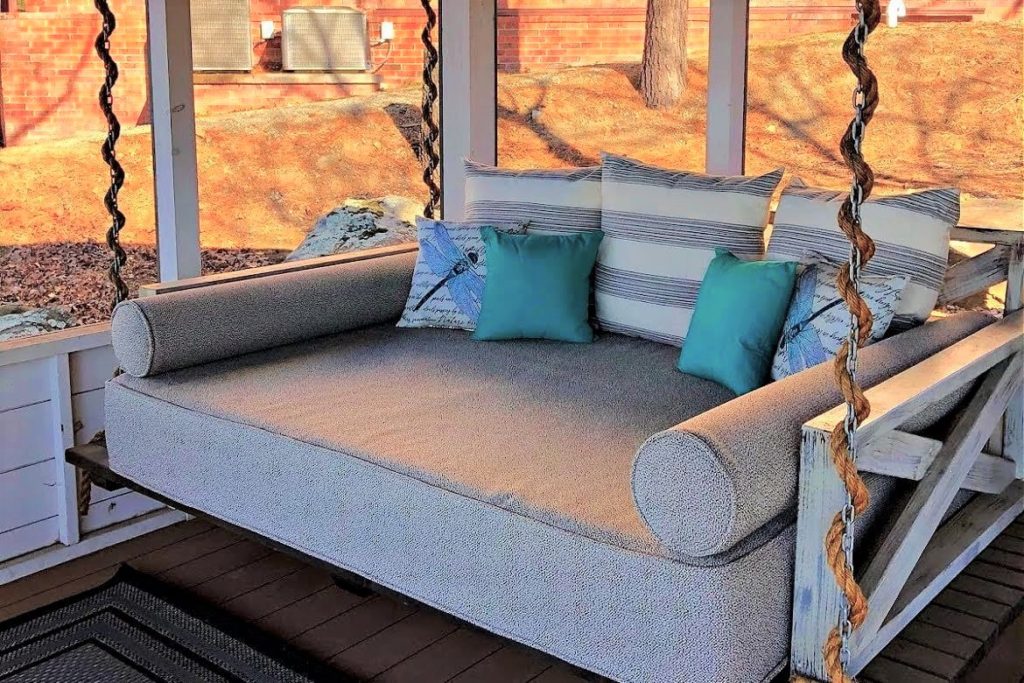
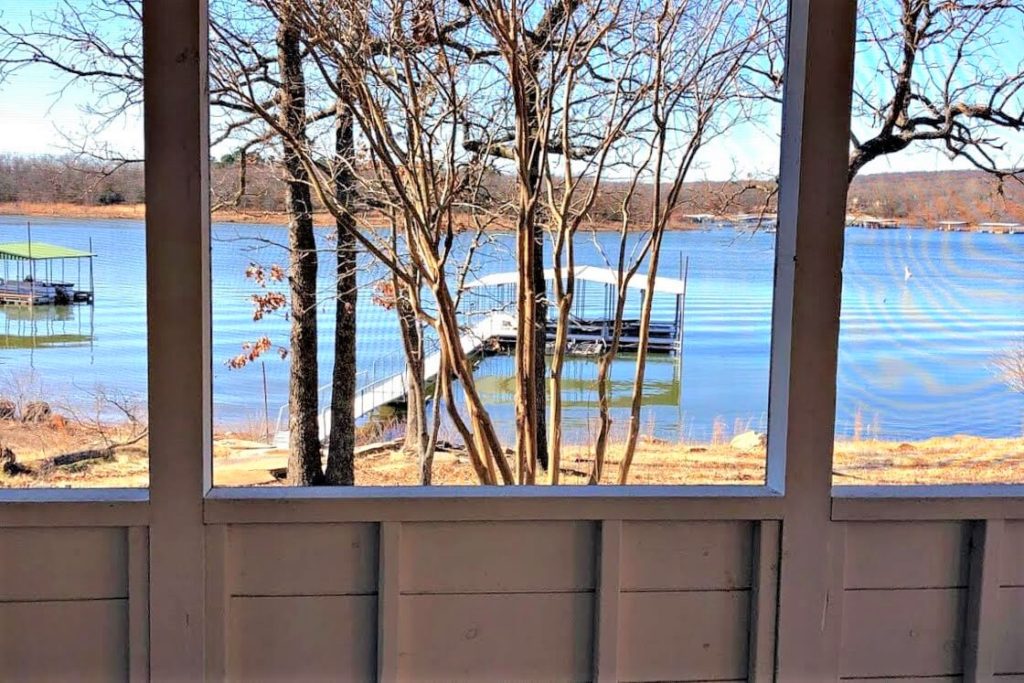
Finally, after all the work my hubby and I put into our screened in porch, we were finally able to use the hanging bed. The work was definitely worth it. Just look at the view from the hanging bed!
I’m not gonna lie – this was really quite a project and there were times that I got extremely frustrated. In fact, I’m pretty sure that I may have uttered a few words unbecoming of a lady. (And maybe more than just a few – LOL!) It was difficult working with sooooo much fabric on my household sewing machine. It would have been tons easier if I had made a covering for a twin-size mattress.
So, would I attempt to make a hanging bed mattress cover again? Yes and no. I would not attempt it on my current sewing machine. I would definitely attempt it on a larger upholstery machine. So, guess what I’m looking for now? Yep, a good preowned upholstery machine.
You see, my sights are set on totally redoing the carpet in our boat (it snaps in). By my calculations, I could purchase an upholstery machine and redo the carpet for the same price it would cost to purchase the carpet inserts. And then I would have an upholstery machine for other projects. (Score!!!! Sometimes I exhaust me!)
Budget
And that reminds me, how did I do on beating the $2,079 online price for my porch swing bed covering and pillow package?
Here’s my total:
$200 – Mattress (bonus, I found it on sale at Sams for $100 off !)
$442 – Fabric for cover, bolsters, 3 back pillows, 2 accent pillows
$107 – 2 Bolster foam
$104 – pillow forms – purchased special pillow forms for the outdoors
$17 – mattress protector
$36 – zippers and thread
A total cost of $906 (a savings of $1,173 or 56%) Woot!!! Woot!!! I definitely consider that a win!
31 comments
It came out very professional looking!!
Thank you Janet!! We are really enjoying it.
This turned out awesome!
This is amazing, Dawn!
Thank you Vicki!!
I don’t think I would be able to pull this off. Great job. It’s beautiful and for less than half price, definitely a win.
I’ve seen it in person and it’s amaz8ng,!
Thanks Janiece!! And we just added some additional lighting to the screened in porch, so you’ll have to come see it at night!
Oh woah! Okay that is absolutely amazing – I love the look of it!
Oh my goodness! You did an amazing job! I love this and of course, your husband did an amazing job on the hanging bed!
This is an awesome project! My favorite part is that it makes sense- cost effective. Often sewing projects seem daunting, AND I think, I could just buy something similar- it would be easier and faster. But in this case you saved tons of money and had the finished product faster than ordering, and it’s customized.
Wow, I love this project. What a great addition to your porch. Great job!
I love this!! I really can’t wait to own a home again so that I can really start doing more DIY projects! Thanks for the inspiration!
This looks amazing! Great work. I’m still working on just learning how to sew.
The hanging bed cover looks incredible! And you definitely cannot beat that price! I’ve been more into DIY for that very reason. Thanks for sharing!
Oh, my. You are so talented. I could never do that. But then, you are the ones who painted the gas tank like a watermelon!
Oh my goodness love! This is amazing. Mama H taught you so well. I wish I knew how to sew. Thank you so much for sharing!
Wow that turned out fantastic. What a lovely spot to hang out.
Wow, reading this post gave me anxiety, but in a good way. 😉 Ha ha I am a novice sewer and am always in awe of experienced sewer’s and their amazing projects.
This is gorgeous. I admire anyone that can make things like this – so beyond anything I could ever do.
This is beautifully fantastic! Great job and savings! I totally pulled a sister move and glazed over the sewing details too! Haha!
Ha! Ha! My sister would be so proud!
What a fun idea! Love this!
This looks amazing! You did a great job! Thank you for sharing!
Well done! I’m envious of your porch and hanging bed in general!
I think this whole project is AMAZING! LOVE IT! Great job!
That looks amazing! Totally better than store-bought! I have zero talent when it comes to sewing!
WOWZA!! Everything about this is amazing. The detail you put in the cover, the bed itself and the background in that picture! What an inviting hanging bed.
Your project is amazing! I’ll bet you use that hanging bed a lot!
That would be amazing!!!
Very Nice! We also have a Lake Home in Duchess Creek! Welcome to Beautiful Lake Eufaula!