

In our last post, I showed you our final completed master bedroom and promised to show our master bathroom ideas from our Texas home. Well, here it goes. Let me begin by saying that Mike and I have about 100 hours of labor just in the tile work in this bathroom. And the 100 labor hours do not include prepping the shower to get it ready for tile like I show in my How to Tile a Shower post. So, you can imagine that we first spent quite a good bit of time designing the master bathroom and making product selections.
From the very beginning, we knew that we wanted to create a bathroom that was beautiful and peaceful. Since we had planned to use so much tile, we wanted to stick with a neutral color palette that was timeless. (We definitely didn’t want to have to update the tile anytime soon!) So, we chose to stick with a black, white, and gray color palette.
You may have noticed that there is a curved wall in the bathroom. On the other side of the curved wall is a curved staircase that goes up to the second story of the home. When Mike and I were designing the home, a similar house that we had seen had the master closet where we located our shower area. It appears the other homebuilder didn’t want to have to deal with the curved wall, so they just closed it in to become part of the master closet. When Mike saw this, he thought “what a terrible waste of a curved wall”. So, he was insistent that the curved wall become a feature in our master bathroom.
The Master Shower
One of our original master bathroom ideas was to locate the tub in front of the curved wall. But, once the bathroom was all framed out, it made more sense for the curved wall to become part of the shower. Once again, Mike’s creative juices were in full force. As the vision for the shower started to materialize, Mike decided to build a bench seat that went all the way around the curved wall.
While I loved the idea of a curved wall in the shower, I thought “How in the world are we going to find tile for it?” Mike said we just need small tile because it can easily form against the curved wall. So, the hunt for tile was on.
While Mike was insistent on the curved wall, I was insistent that the vanity area be tiled all the way up the wall. So, did I mention that we were going to need a lot of tile? (ha! ha!)
Tile for the Shower
I have a confession to make. You may have thought that we spent months researching and trying to find the perfect tile for our feature wall. But, that’s not how it happened at all. One day, we are literally strolling through Home Depot and pop over to the tile area like we ALWAYS do. I just LOVE looking at tile! (I know, weird, huh? Mike’s used to it now. He always says “Let me guess? You want to look at tile.“) And there it is – boxes of black stone and glass tile and boxes of white and gray stone and glass tile marked as CLEARANCE!!!
If you’ve ever priced nice tile, you know how expensive it can be. But, this was 1/2 price!!! Being a CPA, budget is always on my mind. (I will mention that my hubby is NOT a CPA and somehow always finds a way to blow the budget – lol!) So, we quickly scooped up all they had. At the time, we weren’t exactly sure how we would use it, but if it didn’t work for the master bathroom, we still had 2 other bathrooms to tile.
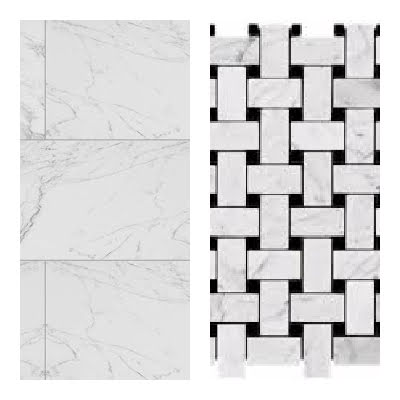
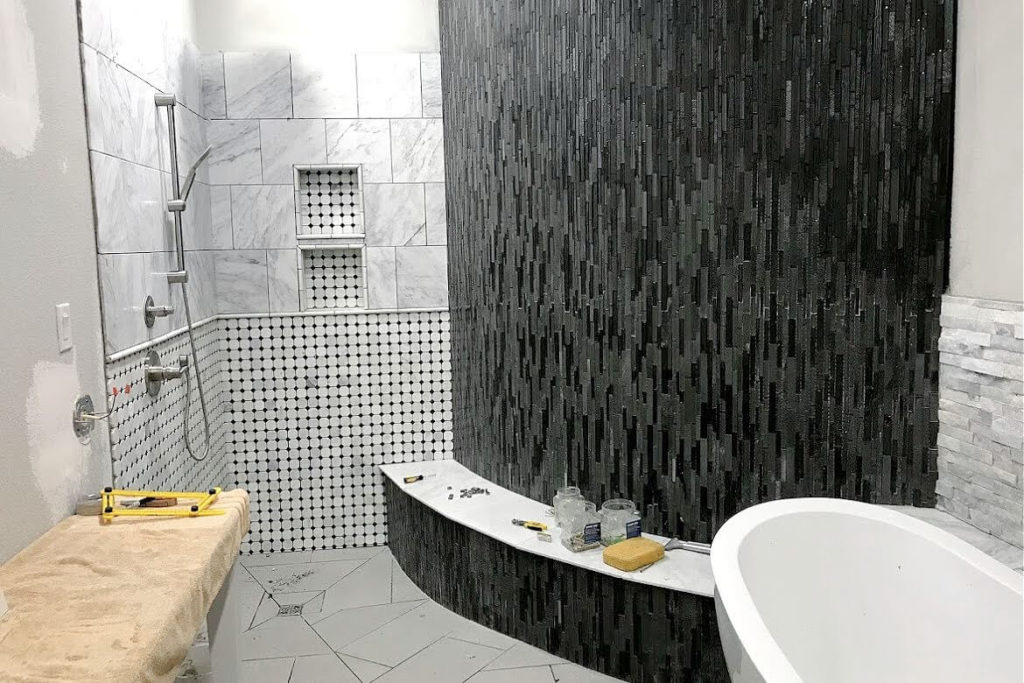
Very early on, we determined that we wanted a classic look in the shower by using white Carrera marble. In order to make the marble shower more interesting, we decided to use 2 different tiles in 2 different sizes. One was a 12″ x 24″ Carrera marble tile. The other was a 12″ x 12″ basket weave Carrera marble tile that incorporated black squares into the design.
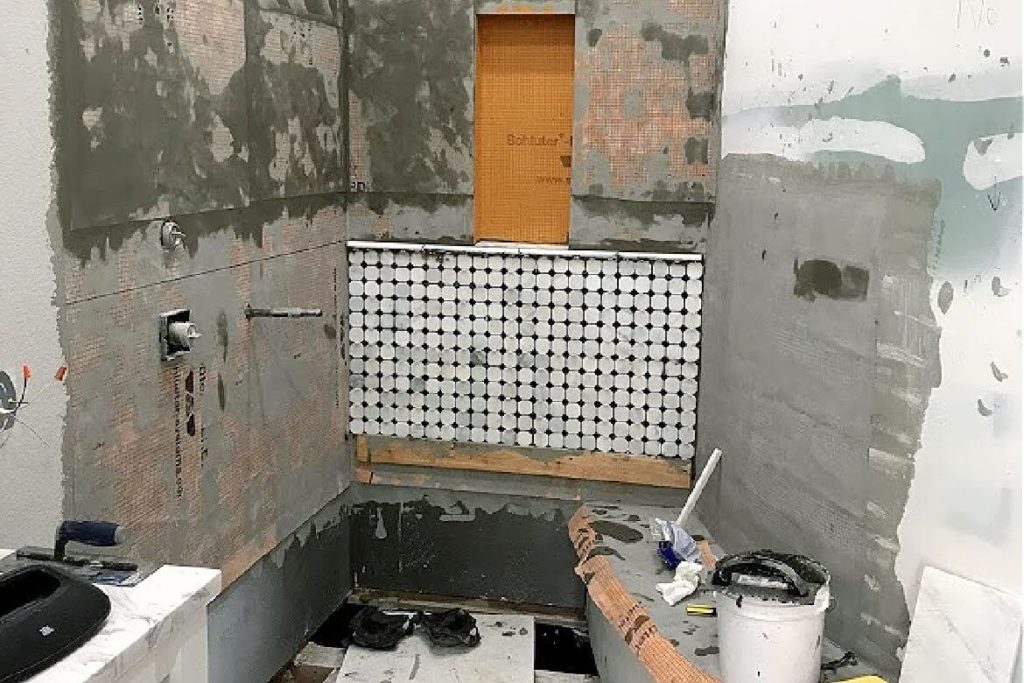
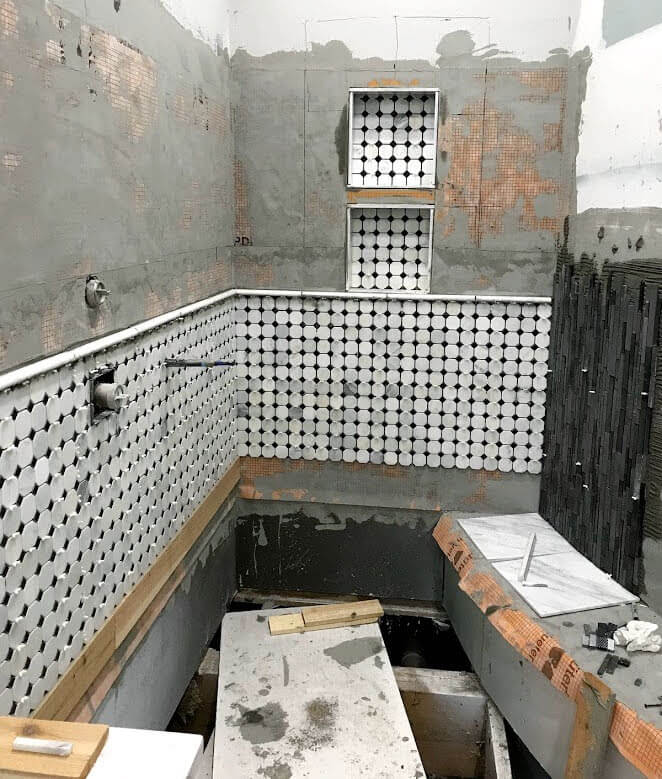
Before tiling the shower, we had added a Kerdi shower niche that was 12″ x 28″. In fact, we prepped our entire shower with Kerdi before we began the tile process. For more information on how we did this, you can see the entire process in How to Tile a Shower.
We decided to place the basket weave tile on the bottom portion of the shower and the solid marble tile on the top. We also placed the same basket weave tile in the back of the shower niche.
And remember that 1/2 price black stone and glass tile that we purchased? It ended up being perfect for our curved feature wall.
We even had enough of the black tile to use on the bottom of the curved bench that Mike built in the shower. We had originally planned to put Grecian marble on the top of the curved bench. But, we couldn’t find anyone willing to cut it for us. Mike offered to “make a pattern” for the fabricator but they still wouldn’t do it. Who knew that one of our best master bathroom ideas would present such a challenge?
So, Mike used our large 12″ x 24″ Carrera marble tile to create the bench seat. (I’m not gonna’ lie. I have no idea how he was able to do this. The guy is insanely good with tile and in problem solving. I was working my day job during the time this task was done, so it all remains a mystery to me – LOL!)
Shower Glass and Faucets
Since we were able to build the shower floor exactly like we wanted, we put in a floor that slightly sloped to the shower drain. This enabled us to have a “curbless” shower. We also decided that we didn’t want a shower door. Now we just needed to enclose it somehow.
One of the most expensive parts of our entire shower is the custom glass for the enclosure. We had three pieces of glass cut and installed by professional glass installers. One piece closed off a majority of the shower but still left ample room for an entry point. The second piece of glass sat on top of the curved bench and was the width of the bench. And the third piece of glass connected the first two pieces of glass together and created a doorway into the shower. It was PERFECT!!
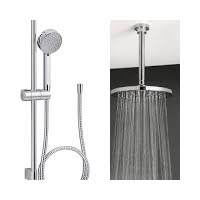
We also did not skimp when it came to purchasing a shower head. I can’t believe how expensive these things are!! Our shower head came with a handheld attachment on a slide bar. The slide bar enables the height of the shower head to adjust. I can’t tell you how much we enjoyed this shower head – especially when it came time to clean the shower. I have now vowed to NEVER have a shower without a handheld feature.
We also went a little over the top and purchased a rain head which we mounted from the ceiling. Although the pics below are not the exact ones we purchased, you get the idea.
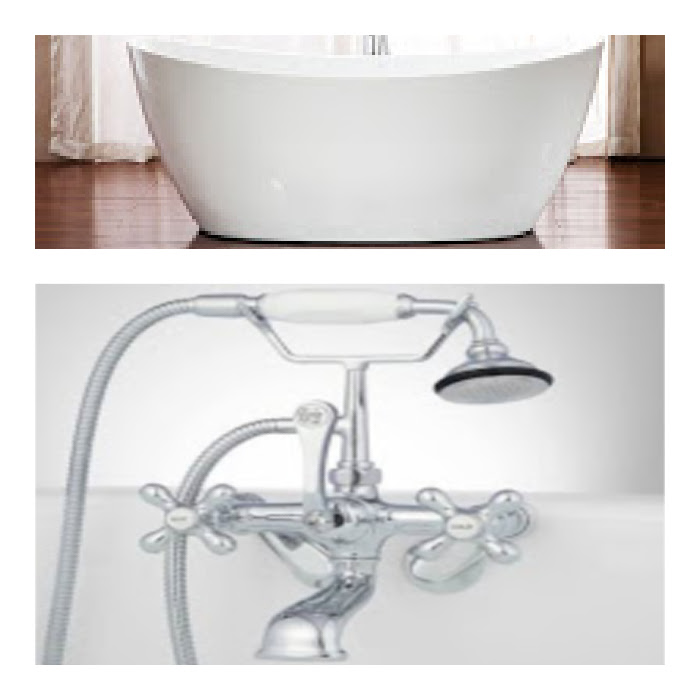
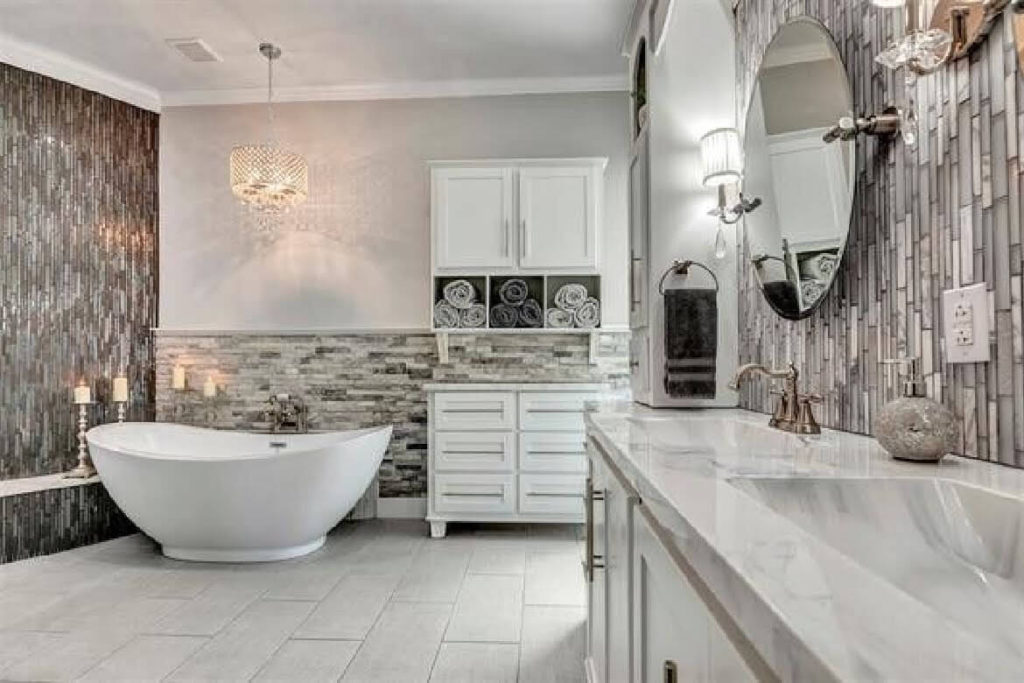
The Tub and Surrounding area
And the master bathroom ideas continue! We purchased this Geeneva free standing acrylic tub from Seconds and Surplus in the Dallas area. For the tub faucet, we selected a wall mounted telephone tub faucet with a removable hand held shower in brushed nickel.
Behind the tub, we had originally planned to trim the wall with wood – possibly shiplap- and paint it. But, when we put the stone tile in our master bedroom, we had a lot of leftovers. We loved the stone so much that we decided to tile the wall behind the tub with it. It was also the perfect way to tie the master bedroom to the master bathroom. To finish off the stone tile, Mike cut a piece of trim for the top.
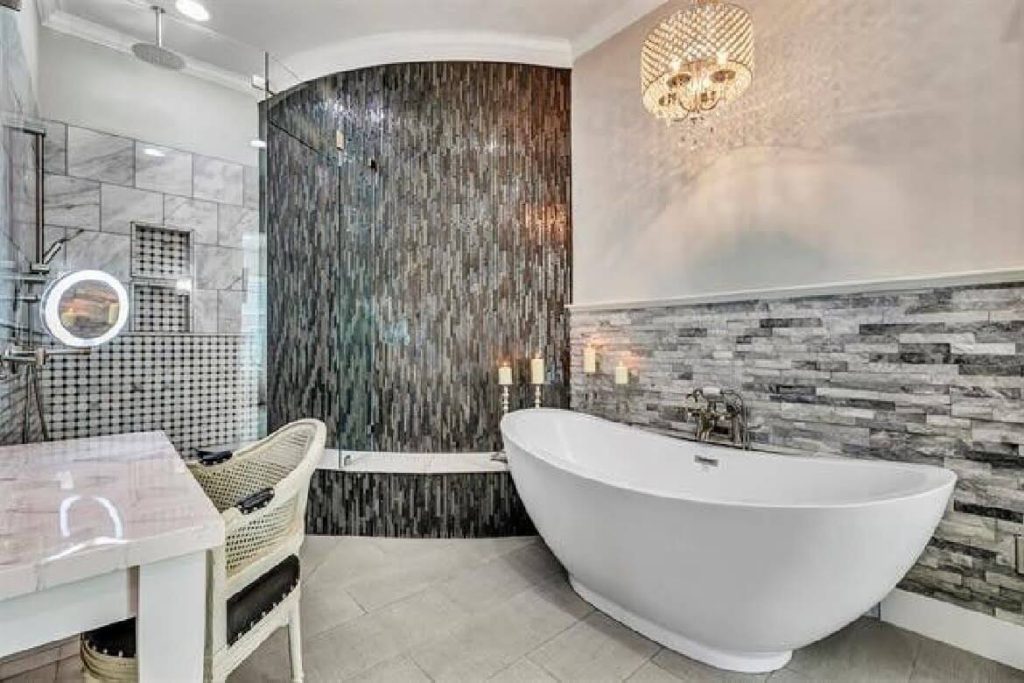
And you may have noticed the chandelier above the tub. I’ve always wanted a chandelier in the bathroom! Across from the tub, our cabinet maker crafted a make-up station for me. For the top of the make-up station, we added Grecian marble. And of course, the make-up station would not be complete without a lighted make-up mirror!!
The Master Bathroom Vanity
And guess where we got to use the gray and white glass and stone tile that we got for 1/2 price? Yep, the vanity. We used gray grout on the tile which really made the tile quite a statement piece! The cabinet maker who made our custom kitchen cabinets also made these bathroom cabinets in the same shaker style. All of the cabinet hardware and paint colors are what we used in our Texas kitchen. It’s amazing the number of master bathroom ideas you can come up with just on your vanity alone!

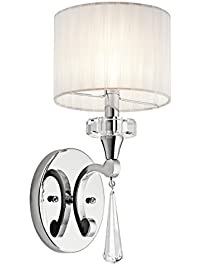
We added 3 gorgeous sconces between the mirrors on the vanity. They are simple yet sophisticated with a single crystal hanging from each one.
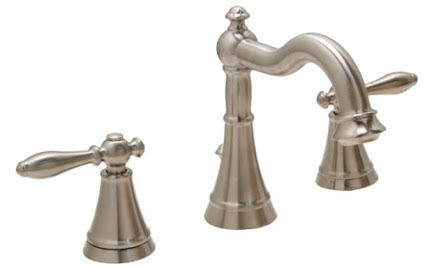
The faucets are called Sherington in satin nickel.
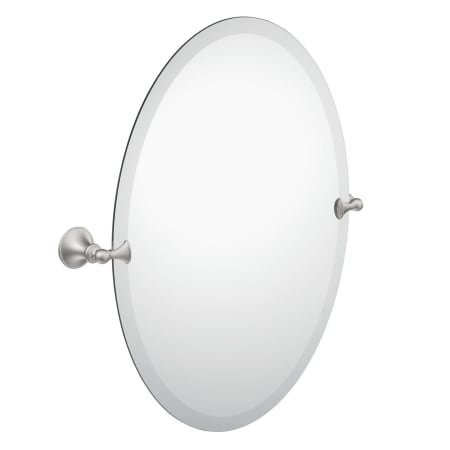
And, we found these nice oval vanity mirrors that tilted by Kichler.
The actual vanity top was Grecian marble which we used on all countertops in the master bathroom.
The Linen Cabinet and Floor Tile
And just to ensure that we had ample storage for all of our towels and other linens, we added one more cabinet. Again, it was custom made by our cabinet maker.
Since we had a lot of tile detail on the walls, we kept the floor tile very simple. It was a nice gray color in 12″ x 24″ pieces which Mike brick laid.
Lessons Learned – Changes to make in our Lake House Remodel
- The bathroom configuration of our lake home is totally different from our Texas home. The single biggest change is that there is no curved staircase in our lake home. This means no curved wall in the bathroom (sad face). So, we will just have to find other ways to make our new bathroom unique.
- No rain shower head. While a rain shower head sounds amazing, it’s not all it’s cracked up to be. First, I can probably count on one hand the number of times that I actually used it. It’s too expensive to install if you’re not going to use it. Also, in our shower, you could either have the rain head on OR the shower head. But, you couldn’t have both on at the same time. This wasn’t a deal breaker for me but the cold water that would come out of the rain head WAS a deal breaker.
- So I would have the shower on at a perfect temperature and decide to use the rain head. I flipped it over to rain head and COLD water would come out. The rain head had to release all of the cold water that was already in the line BEFORE my nice warm water would come out.
- And the last reason I’m not promoting the rain head is that it was difficult to shampoo your hair when it was on. Since the water beats directly on top of your head, you have to move out from under it to apply shampoo. When you do that, it’s cold (Burskies!!) I guess you’ve figured out that I don’t want to be cold in any way when showering – lol!
- No small drawers in the vanity cabinet – These drawers weren’t big enough to really house anything. Although they looked nice, they were really expensive for not much function. I mentioned this same thing in our Texas kitchen.
Now that you’ve seen master bathroom ideas from our Texas home, I hope I’ve given you some things to consider. Everyone has their own style and personal preference. You just need to figure out yours before attempting a remodel or a new build. For me, the best way to get ideas is to look at master bathrooms that are already finished. I mean, why reinvent the wheel, right?
2 comments
I enjoy reading your journey
Thank you Deorma!!